| Hours today: |
5.6 |
Hours wings: |
230.6 |
Hours total: |
329.5 |
| Rivets today: |
296 |
Rivets wings: |
4165 |
Rivets total: |
6244 |
With the frames and skins all together, I checked the flatness of the ribs, and flattened where necessary. I ran the wires for the strobe and the landing lights in place to get lengths right, then riveted the ribs to the spars.
This is relatively easy, except for the five ribs under the walking area on the wing. When I assembled the right wing, I forget to rivet the flanges on the side of the spar to each rib, which meant a lot of painful rework. This time I thought it through. If the ribs are counted 1 from the root, to 4, the last full rib, then 5, the arched rib, I fitted 4, 3, 2, 1, 5.
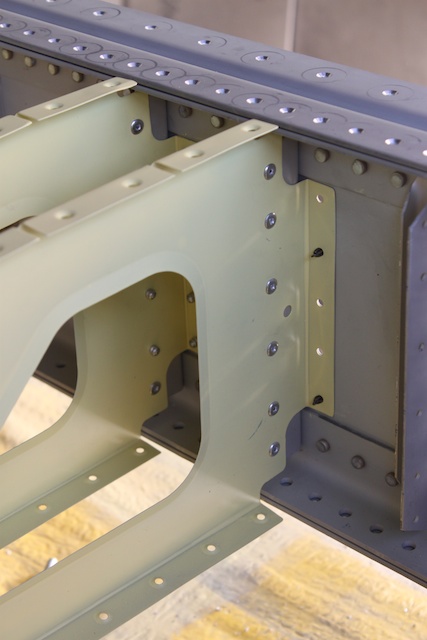
Turns out that isn’t the best option. The flanges on the main spar get in the way of the riveter, so it is difficult to get the rivets in cleanly. If I were to do it again, I’d go 3, 2, 1, 4, 5. 5 has to be last, as the torque tube must go in before 5 goes in. The picture shows how I ended up doing most of the rivets in 4 from the wrong side.

Rib 4, showing the change in riveting direction
Rib 3 in front. It has been riveted to the flange, but not yet to the spar itself.
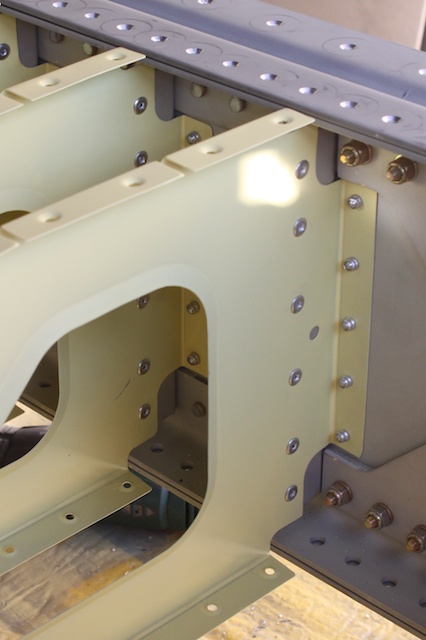
Rib 2 in front.
Rib 1 is a sod to get in. It is stiff metal, and there isn’t enough room. I took off the clecos at the trailing edges of 2 and 3 to give myself some more room, and with a bit of twisting, it all went together.
All went well, until I starting putting the diagonal component onto the rear spar. Then I realized I’d riveted the five spars under discussion here to the rear spar without putting in the small triangles in the picture below. Out came the drill. Sorted now. It just shows, you have to keep your wits about you.

Rear triangles behind ribs under walk area.
Then it was time to put the long diagonal piece onto the rear spar permanently. It all looks good.

View from below the rear spar in the region of the walk area.