30 March 2013: Right wing 54

Hours today: 1.4 Hours wings: 210.6 Hours total: 309.5
Rivets today: 0 Rivets wings: 3786 Rivets total: 5865

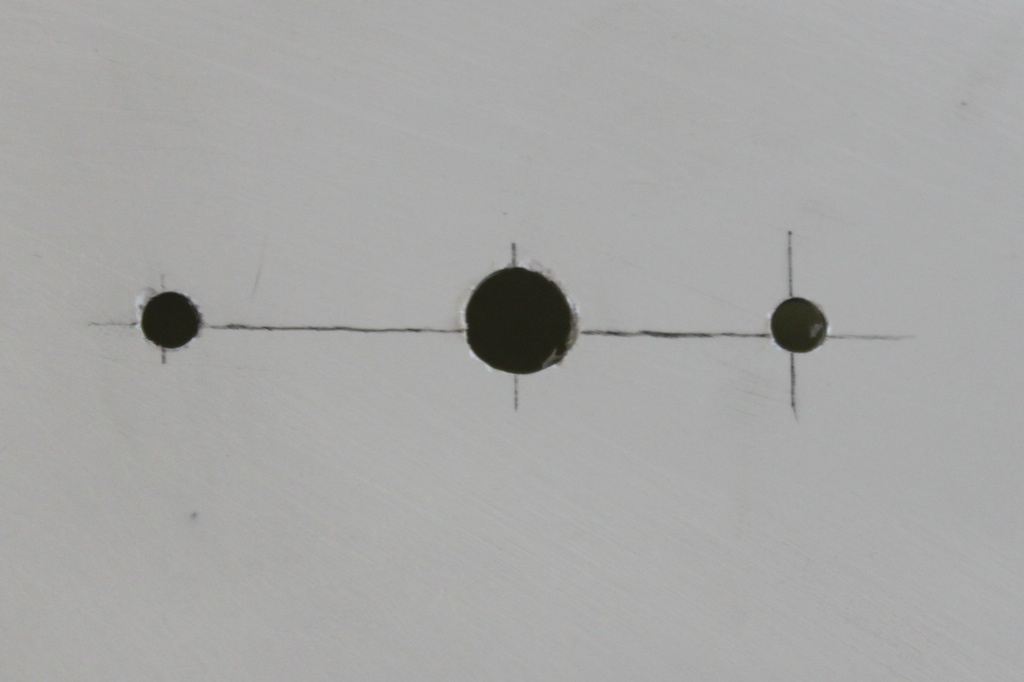
I worked out that the best way to position the lower edge of the wingtip relative to the skin was to mark a line on the wingtip that should go in line with the edge of the skin. In the poor photo below, the original position of the holes is marked by the horizontal stroke, which would have been too close to the edge. The second attempt was the crosses, but I didn’t have faith in them, so I drew the line, then drilled a couple of holes while holding the line in the desired position.

Marking the edge of the wingtip.

Marking the edge of the wingtip.

After getting a couple of holes in the right places, I cleco’d the wingtip in place and started to drill the other holes. I very quickly found that on the bottom, the drill was getting through the composite, then pushing the aluminium strip away rather than drilling through it. Instead, I marked the desired drill positions with shallow drill holes, then took the wingtip off and drilled with a wooden block against the back of the hole to keep the alumium strip in place.

It didn’t work well enough, the lower strip just wasn’t well enough glued. I had used Pratley’s transparent pro expoxy, which comes in a joined pair of syringes. Something to do with the bottom layer just wasn’t good enough though.

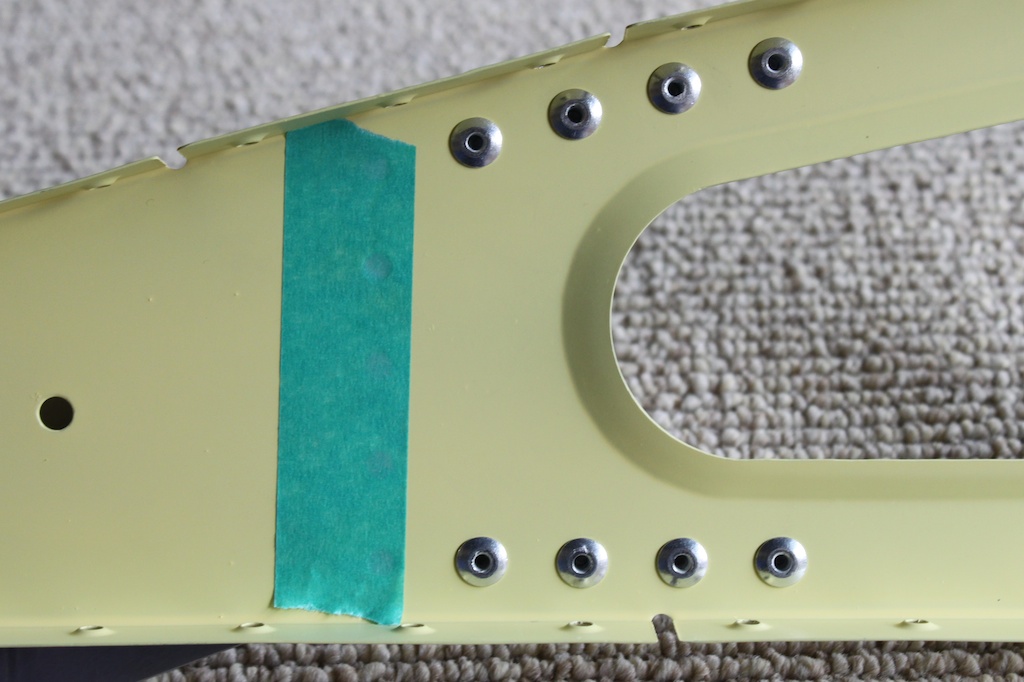
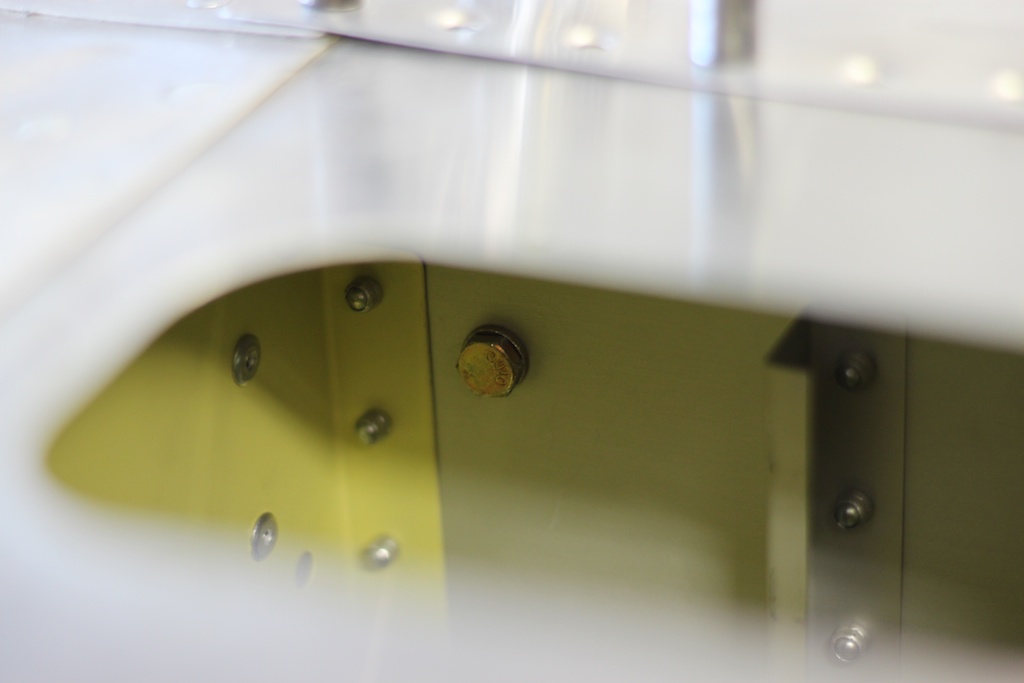
Before fixing the problem, I countersunk all the holes, first in the countersink tool, which gave the aluminium the right shape, then by drilling countersunk holes.

atank_ 038

Final countersunk holes in the wingtip skin. The aliminium layer is just visible at the bottom of the left hole.

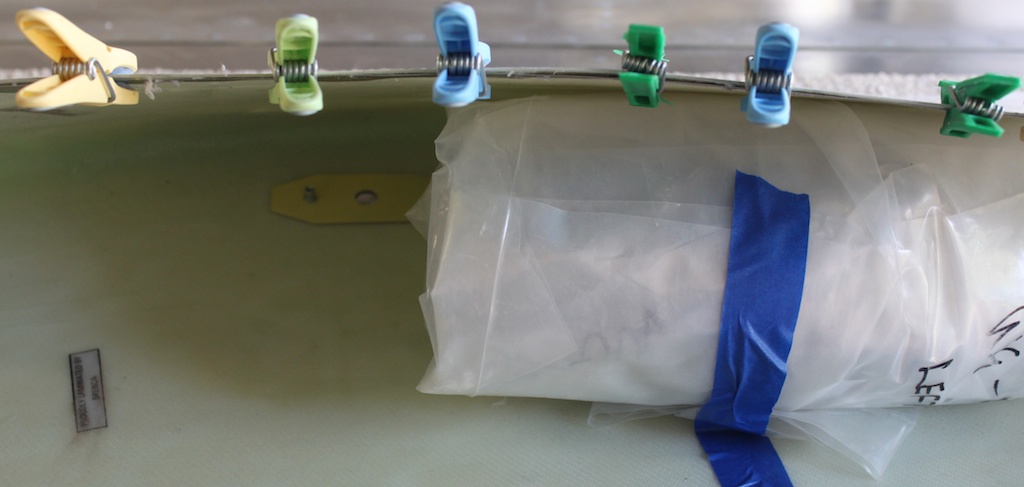
Finally, I took the lower aluminium strip off properly, cleaned it and the wing and glued in back using Pratley’s Ezee Bond, advertised as specifically for metal and fibreglass. Once the two parts are mixed it has the consistency of honey mixed with chewing gum. It is also advertised as not needing degreasing, and seeing how tenacious it was, I can believe that. To hold the strip in place, I used clecos in all the holes.

Clecos holding the bottom aluminium skin against the wingtip while it is glued into place.

Clecos holding the bottom aluminium skin against the wingtip while it is glued into place.

I don’t even need the aluminium to stay stuck for very long – just long enough to put the rivets in. Let’s hope this solution works.

29 March: Right wing 53

Hours today: 2.5 Hours wings: 209.2 Hours total: 308.5
Rivets today: 0 Rivets wings: 3786 Rivets total: 5865

Marked up the wingtip for the nav and strobe lights and drilled the holes:

atank_ 034

Drilled.

atank_ 035

Rivnuts inserted


Then glued aluminium strips into the inside of the wingtip to give the rivets something to grab after the wingtip has been countersunk.

Aluminium strip glued to top skin. The mounting plate for the light is just visible behind. The fat pack of loose plastic bags is there to push the wingtip sides apart for easier fitting.

Aluminium strip glued to top skin. The mounting plate for the light is just visible behind. The fat pack of loose plastic bags is there to push the wingtip sides apart for easier fitting.

Aluminium strip glued to bottom of wingtip.

Aluminium strip glued to bottom of wingtip.

Once the aluminium was dry, I fitted the wingtip and drilled a couple of holes into the top. After I’d checked that they were in okay, safe in the aluminium, I cleco’d them in place and marked out the bottom. It turned out, all the holes were too close to the edge. I had to move the holes on the top slightly to get the bottom to fit nicely.


24 March: Right wing 52

Hours today: 1.4 Hours wings: 206.7 Hours total: 306.0
Rivets today: 91 Rivets wings: 3786 Rivets total: 5865

Rivetted the end rib to the spars and skin. It is a tricky operation in terms of sequencing. First, I at attached the aileron support to the rib.

Aileron bracket attached to rib. The tape is to stop me rivetting things that have to wait till later.

Aileron bracket attached to rib. The tape is to stop me rivetting things that have to wait till later.

The rib attaches to the spars with two brackets, but that brackets have to go onto the spars before they are attached to the rib, or there is no space to get the rivet gun in. I tried to be consistent with the existing rivets, but couldn’t manage it in some places, where I simply couldn’t get the gun in from the correct side.

atank_ 031

Rivets on bracket to main spar, put in from the wrong direction. The rivet gun is too large to get in the leading edge of the wing on the top of the wing where the skin goes down rapidly.

atank_ 032

The rear bracket on the rear spar. All the rivets come from the outside apart from the top one, where the nose of the gun wouldn’t fit past the skin.

Once the brackets were in, it was an easy job to rivet the rib to the brackets and the skin. Job done.

atank_ 033

The nose of the wing, showing the rib rivetted to the skin.


23 March: Right wing 51

Hours today: 1.2 Hours wings: 205.3 Hours total: 304.6
Rivets today: 0 Rivets wings: 3695 Rivets total: 5774

Turned the wing over to work on the underside. I had hoped to fit rivnuts to the two inspection hatched, but I couldn’t find the rivnuts. Instead, I cleaned the inside of wing where dust had fallen in through the hatches, then countersink the four smaller hatches that allow access to the bolts that secure the tank to the main spar. These hatches will be rivetted on at a later date. Then turned the wing right-side-up again, removed the jig that supports the tip end of the wing, and supported the wing on a wooden box and a pillow.

wingtip end of wing supported on box and pillow, with the end spar cleco'd in.

wingtip end of wing supported on box and pillow, with the end spar cleco’d in.


10 – 22 March: Right wing 45 – 50

Six days, nearly 13.5 hours, just to put filler in all the rivets on one side of the wing. Here are the gory details.

10 March

Hours today: 1.7 Hours wings: 192.4 Hours total: 290.7
Rivets today: 69 Rivets wings: 3695 Rivets total: 5774

Turned the wing over, rivetted the top of the tank onto the main spar and the adjacent skin, then filled the centres of about a quarter of the rivets on the top of the wing.

17 March

Hours today: 2.4 Hours wings: 194.8 Hours total: 293.1
Rivets today: 0 Rivets wings: 3695 Rivets total: 5774

Cut off the excess from the holes already filled, filled more holes, and placed donuts around the centres that were finished.

18 March

Hours today: 1.0 Hours wings: 195.8 Hours total: 294.1
Rivets today: 0 Rivets wings: 3695 Rivets total: 5774

More of the same.

19 March

Hours today: 0.6 Hours wings: 196.4 Hours total: 294.7
Rivets today: 0 Rivets wings: 3695 Rivets total: 5774

Just cut off some excess on holes.

21 March

Hours today: 3.8 Hours wings: 200.2 Hours total: 299.5
Rivets today: 0 Rivets wings: 3695 Rivets total: 5774

Filled centres, but didn’t wait for them to get hard, I just flattened them. This didn’t work brilliantly, the filling in the centres tended to push out when flattened. But mostly: fill, cut-off, flatten, mostly on tank, also on wing.

22 March

Hours today: 3.9 Hours wings: 204.1 Hours total: 303.4
Rivets today: 0 Rivets wings: 3695 Rivets total: 5774

Next, I tried cutting off the excess in the holes when it had had about an hour or three to dry. That worked well. The filler was hard enough to maintain its shape, but much easier to cut then when completely hard. Did lots of donuts, and then…. Halleluiah, all the rivets on the wing are finished.

27 January – 3 March 2013: Right wing 42 – 44

27 Jan

Hours today: 2.6 Hours wings: 188.7 Hours total: 287.0
Rivets today: 0 Rivets wings: 3626 Rivets total: 5705

Sanded the rivet heads on the underside of the tank, then degreased and filled all the rivet holes.

Filled rivet holes on underside of tank. The overflow is also visible connected to some pipe for pressure testing.

Filled rivet holes on underside of tank. The overflow is also visible connected to some pipe for pressure testing.

2 Feb

Hours today: 0.8 Hours wings: 189.5 Hours total: 287.8
Rivets today: 0 Rivets wings: 3626 Rivets total: 5705

Removed the excess from the filled holes.

[The traveled and got sick and lived life and stuff.]

3 March

Hours today: 1.2 Hours wings: 190.7 Hours total: 289.0
Rivets today: 0 Rivets wings: 3626 Rivets total: 5705

Filled the donuts around all the rivets on the tank. The underside of the tank and the wing is FINISHED! Only the top side with its hundreds of rivets to finish off. The task is daunting, and I have been putting it off for way too long.

25 and 26 January 2013: Right wing 40 and 41

25 Jan

Hours today: 1.4 Hours wings: 183.6 Hours total: 281.9
Rivets today: 0 Rivets wings: 3558 Rivets total: 5637

Put new anchor nuts on the right fuel tank, then fitted the tank onto the wing.

26 Jan

Hours today: 2.5 Hours wings: 186.1 Hours total: 284.4
Rivets today: 68 Rivets wings: 3626 Rivets total: 5705

Oops. I noticed that a bolt was missing near the wing root, running through the first rib and the main spar:

The missing bolt.

The missing bolt.

There is only one problem: the bolt head itself is inside the tank that I’ve just fitted. Before I got too excited, I checked the record. Here’s a main spar I took a photo of at the factory:

The bolts on the main spar at the factory, note that there is one gap and five bolts.

The bolts on the main spar at the factory, note that there is one gap and five bolts.

I compared that to a photo of my main spar before the tank went on, taken quite a while back:

my_root_4bolts 003

My tank: note four bolts and two holes.

What a pain. The bolts that hold the tank in place are accessed through small hatches in the underside of the wing, so it was back in with my definitely not inspector gadget hands, take them off, put the bolt where it belongs, then torque up the eight bolts that hold on the tank again.

The head of one of the bolts that holds the tank onto the main spar.

The head of one of the bolts that holds the tank onto the main spar.

All now looks well, so I riveted the underside of the tank to the main spar. After all the manhandling, I wanted to check that the tank was still airtight. It appears to be.

Testing the airtightness of the fitted tank.

Testing the airtightness of the fitted tank.

16-20 January: Right wing 37-89

16 Jan

Hours today: 1.0 Hours wings: 179.7 Hours total: 278.0
Rivets today: 0 Rivets wings: 3558 Rivets total: 5637

Filled holes in bottom of wing, did some donut filling and lots of splodge removal.

18 Jan

Hours today: 1.0 Hours wings: 180.7 Hours total: 279.0
Rivets today: 0 Rivets wings: 3558 Rivets total: 5637

I confirmed on visiting the factory that the anchor nuts I’d been supplied for the fuel tanks were the wrong size, so today I removed the nuts I’d put on the right tank. Then I removed excess from some donuts. All the holes and about half the donuts on the bottom of the wing have been filled.

20 Jan

Hours today: 2.5 Hours wings: 182.2 Hours total: 280.5
Rivets today: 0 Rivets wings: 3558 Rivets total: 5637

Finished all the donuts on the underside of the wing.

15 January: Fuselage 1

Hours today: 4.0 Hours fuselage: 4.0 Hours total: 277.0
Rivets today: 0 Rivets fuselage: 0 Rivets total: 5637

Received the fuselage kit, and spent a long while checking it against the inventory. It was mostly there… The process gave me a chance to figure out what is in the kit, and also to store it.

The kit is a monster: a flat box weighing 130kgs, and a few longer pieces packed in bubble wrap. The box is full: lots of skins, and also some big heavy pieces of metal like the engine mount. It is certainly exciting to see what is in store.

The fuselage kit on collection.

The fuselage kit on collection.